はじめに
今回はPHP Intelephenseを使ってphpファイルのコードを自動整形するやり方について説明していきます。
多くの方が使用するコード整形ツール「prettier」ですが、そのままではphpのファイルに対してコード整形してくれないですよね。
phpのファイルに対しては、コードの自動整形はあきらめて手動でされている方も多いのではないでしょうか。
phpファイルのコード整形ツールを探している方や導入方法を知りたい方はぜひ参考にしてみてください。
それではphpのコードを自動整形するやり方の説明に移ります。
解決すること
prettierは様々な言語に対してコードを自動整形してくれるので非常に便利ですが、phpのファイルに対しては自動整形してくれません。
(prettierの拡張機能を使用すれば可能ですが初心者の方にとっては難しい・・・)
htmlやcssではprettierを使用していたけど、WordPressでphpを使用してからは手動でコード整形しているといった方も多いのではないかと思います。
PHP Intelephenseを使うとphpでもコードの自動整形ができるようになって、快適にweb制作を進めていくことができるようになります。
事前準備
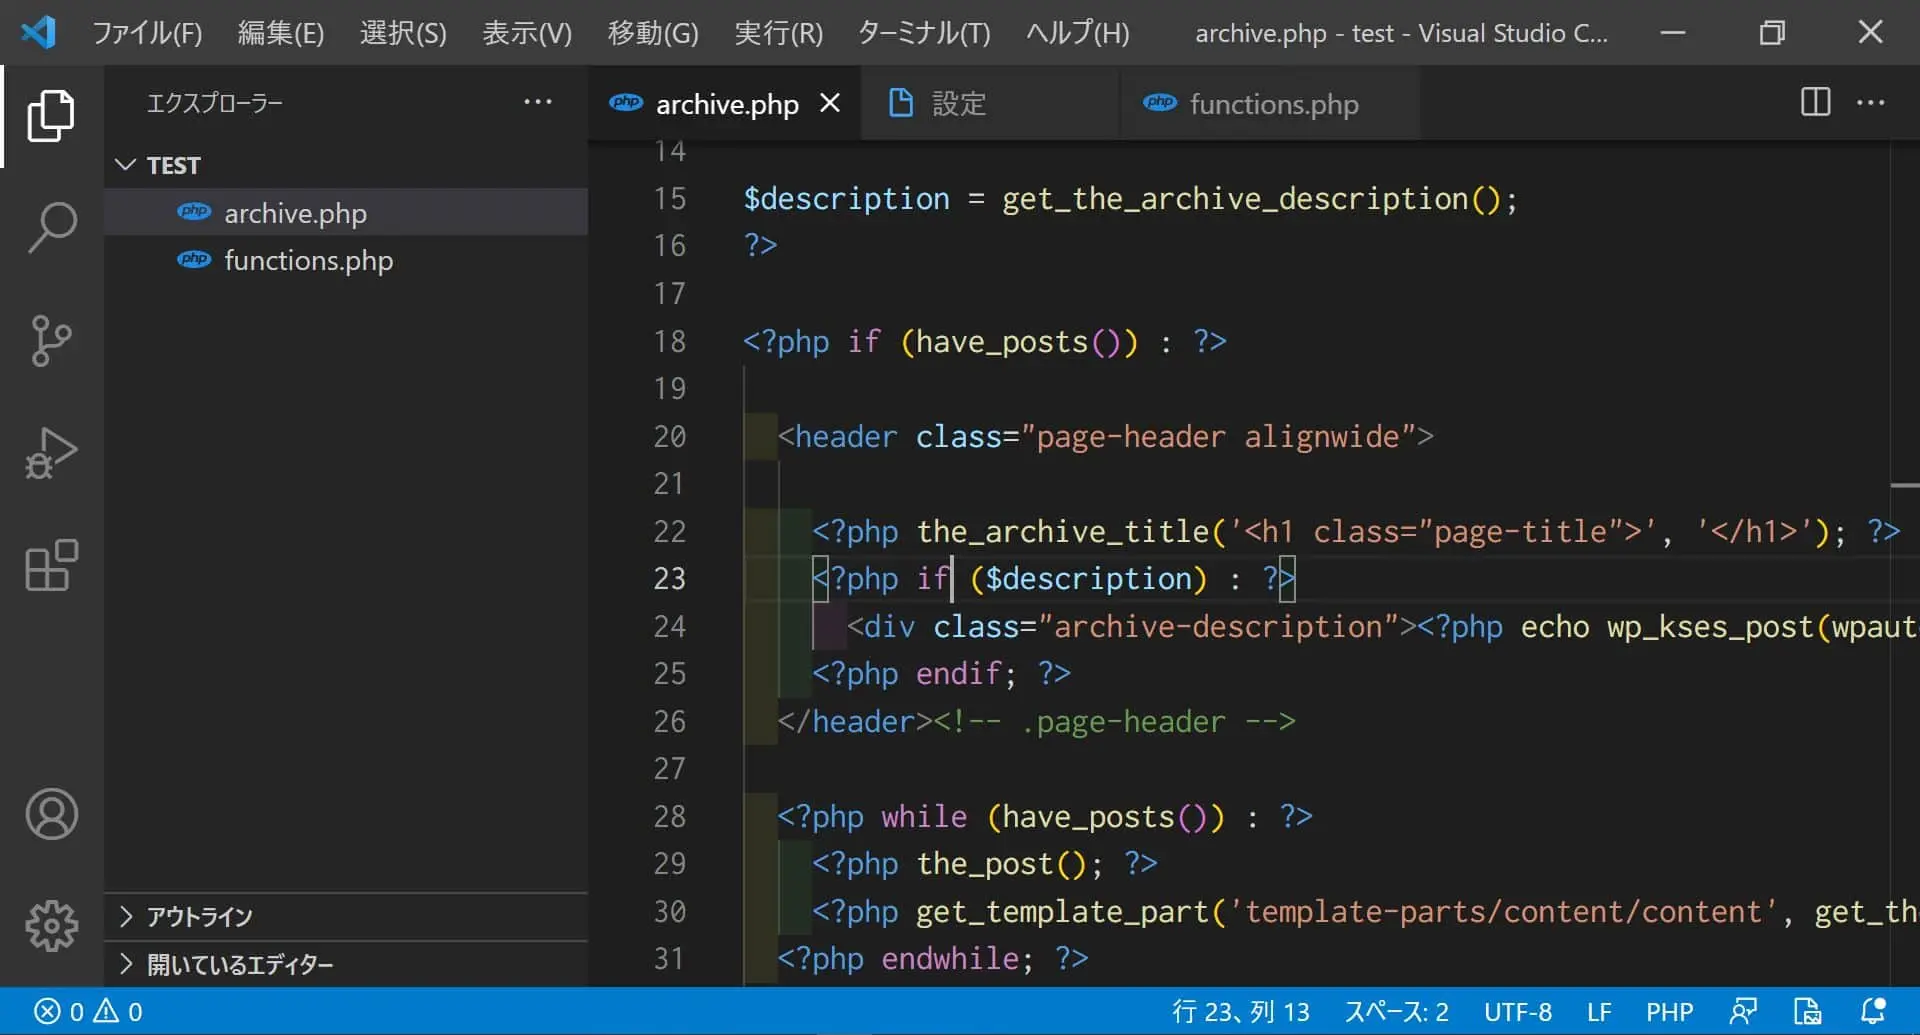
事前準備としてコードが統一されていないphpファイルを2つ用意しておきます。
twentytwentyoneのテーマから抜粋してコードを崩しています。
phpのみファイルとhtml入りphpファイルです。
phpのみファイル
<?php
/**
 * Functions and definitions
 *
 * @link https://developer.wordpress.org/themes/basics/theme-functions/
 *
 * @package WordPress
 * @subpackage Twenty_Twenty_One
 * @since Twenty Twenty-One 1.0
 */

function twenty_twenty_one_widgets_init() {   	register_sidebar(
		array(			'name'          => esc_html__( 'Footer', 'twentytwentyone' ),
			'id'            => 'sidebar-1',
			             'description'   => esc_html__( 'Add widgets here to appear in your footer.', 'twentytwentyone' ),
	'before_widget' => '<section id="%1$s" class="widget %2$s">',
'after_widget'  => '</section>',
			'before_title'  => '<h2 class="widget-title">',
			'after_title'   => '</h2>',
		)  	);
}
add_action( 'widgets_init', 'twenty_twenty_one_widgets_init' );
html入りphpファイル
<?php

/**
 * The template for displaying archive pages
 *
 * @link https://developer.wordpress.org/themes/basics/template-hierarchy/
 *
 * @package WordPress
 * @subpackage Twenty_Twenty_One
 * @since Twenty Twenty-One 1.0
 */

get_header();

$description = get_the_archive_description();
?>

<?php if              (have_posts())              : ?>

  <header
  class="page-header alignwide">

    <?php the_archive_title(         '<h1 class="page-title">', '</h1>'); ?>
    <?php if
     ($description) : ?>
                <div class="archive-description"><?php echo wp_kses_post(wpautop($description)); ?></div>
    <?php endif; ?>
  </header><!-- .page-header -->

                      <?php while (have_posts()) : ?>
    <?php the_post(); ?>
      <?php get_template_part('template-parts/content/content', get_theme_mod('display_excerpt_or_full_post', 'excerpt')); ?>
         <?php endwhile; ?>

<?php                   else : ?>
  <?php get_template_part('template-parts/content/content-none'); ?>
<?php endif;           ?>

<?php get_footer(); ?>
ぐちゃぐちゃですね!
それではこれらのコードを自動整形していきましょう。
PHP Intelephense をインストールしよう
コードの自動整形をしていきます。
まずはPHP Intelephenseをインストールするやり方について説明していきます。
以下赤枠の検索窓から「PHP Intelephense」と検索してプラグインをインストールしましょう。
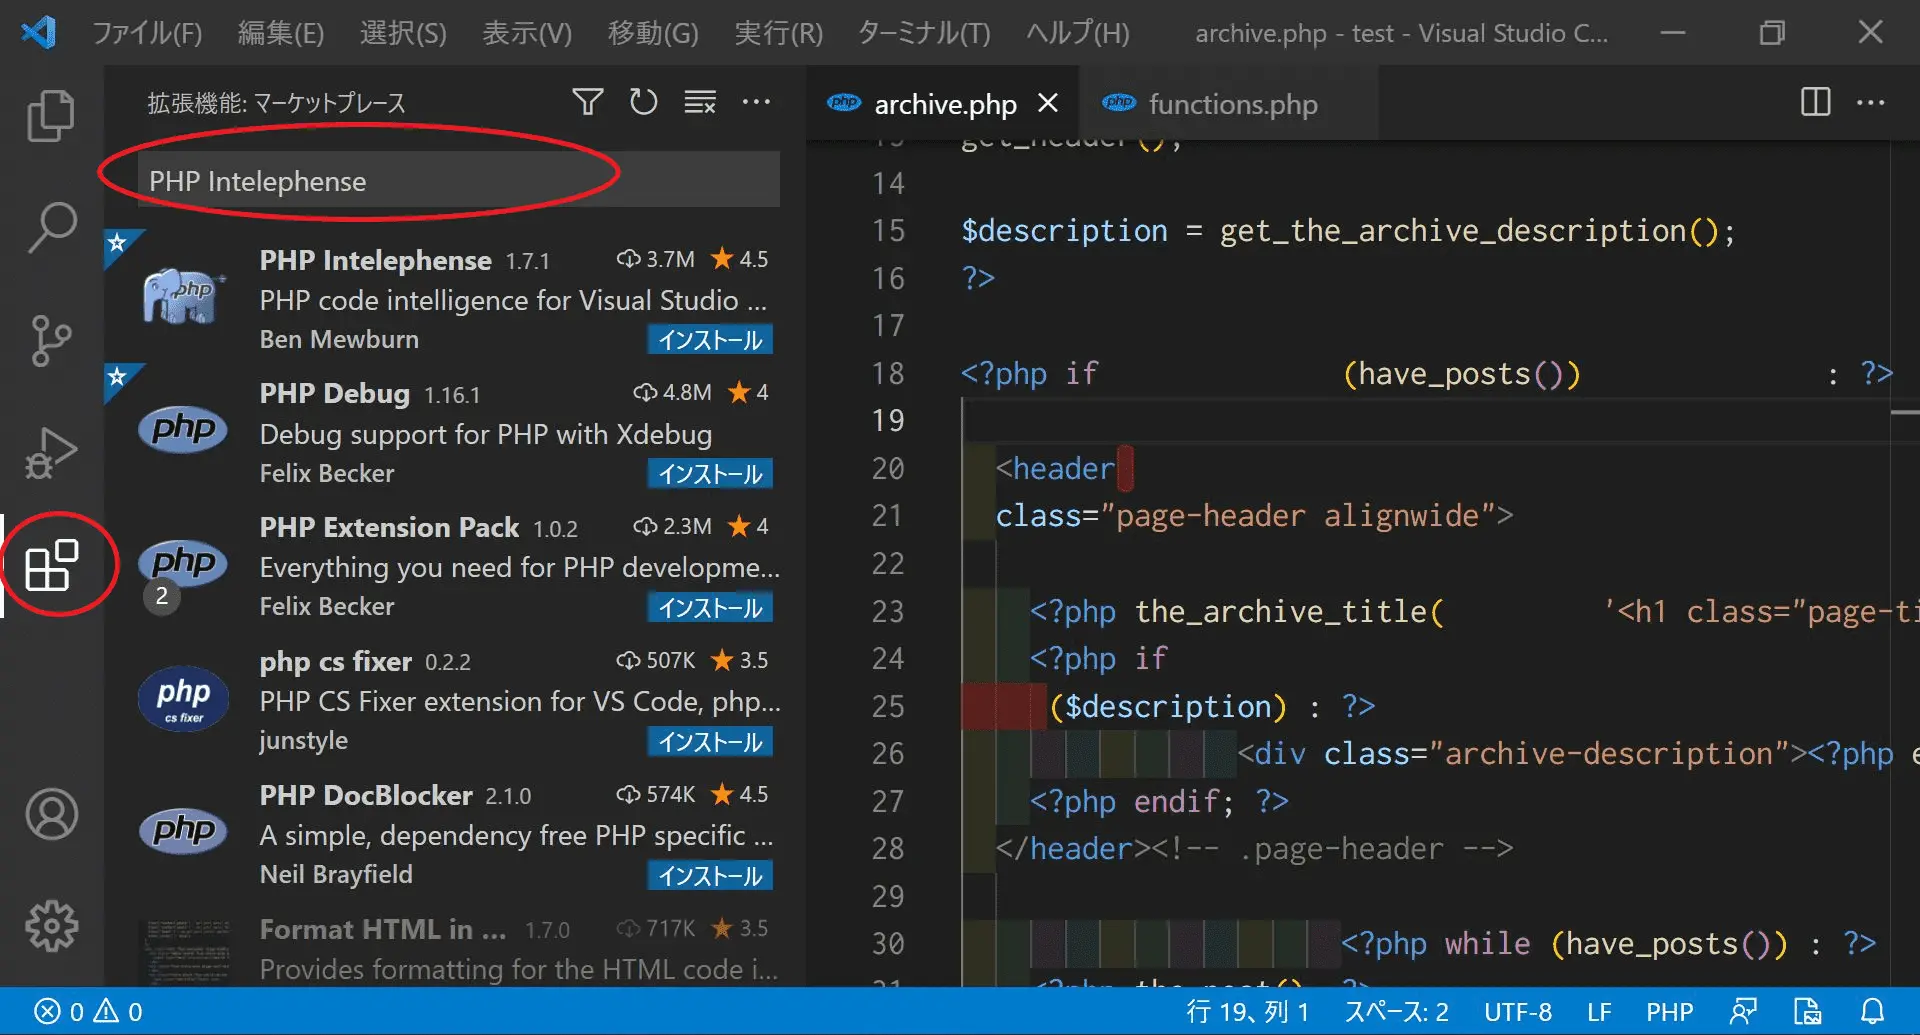
インストールが完了して、phpファイルを見てみるとWordPressのテンプレートタグ全てにエラーの波線が出るかと思います。
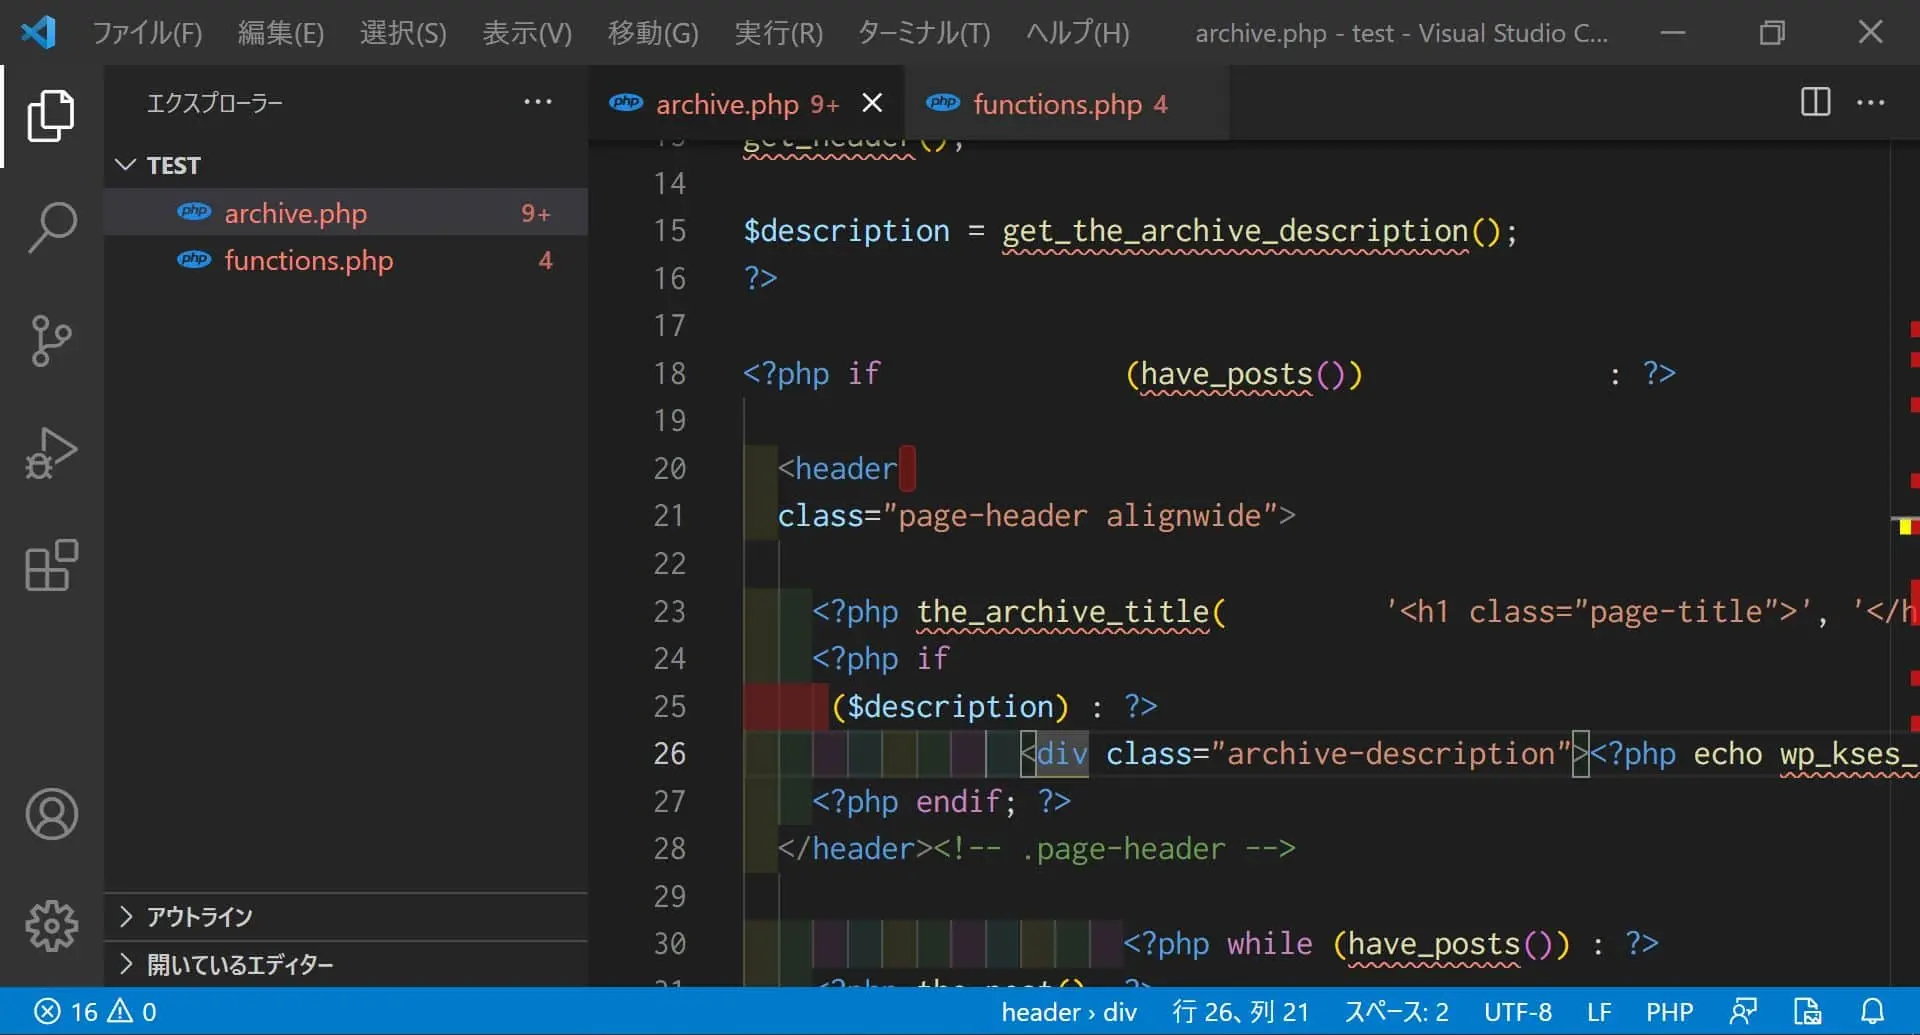
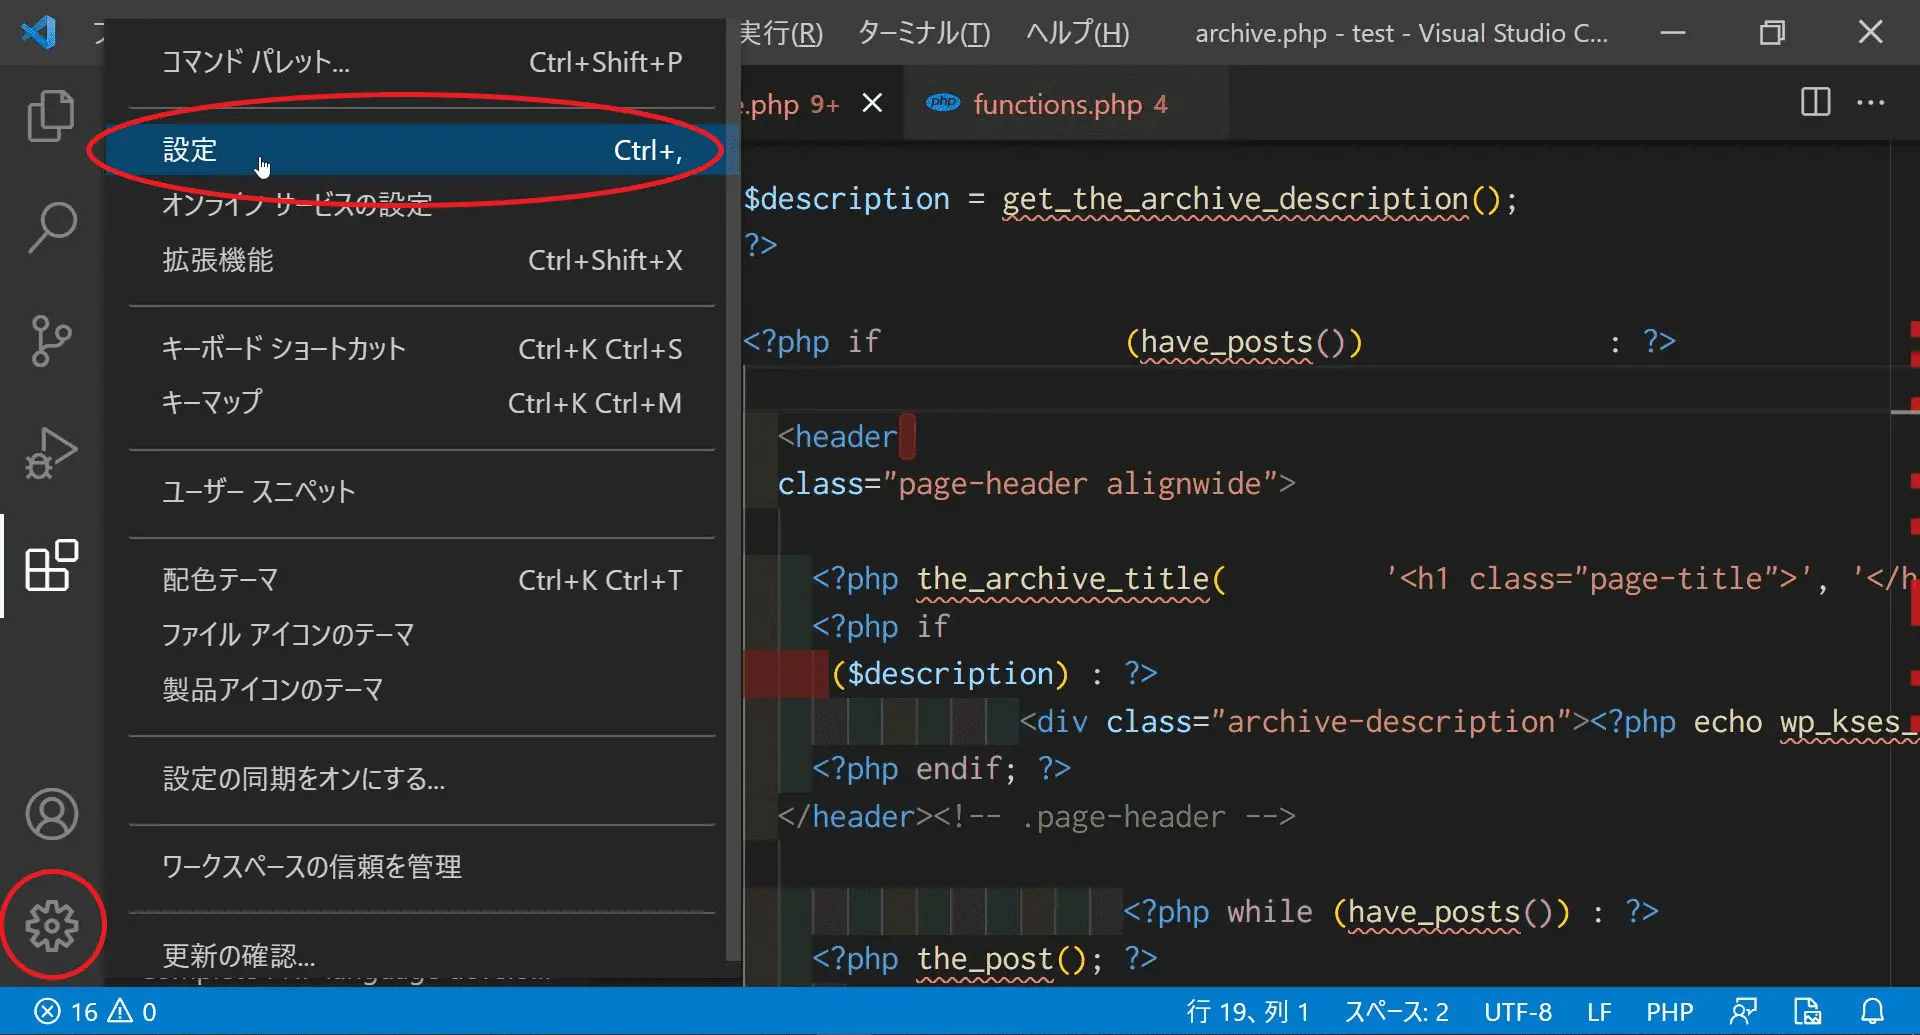
エラーが出ないようにPHP Intelephenseの設定をしていきましょう。
以下赤枠から「設定」をクリックします。
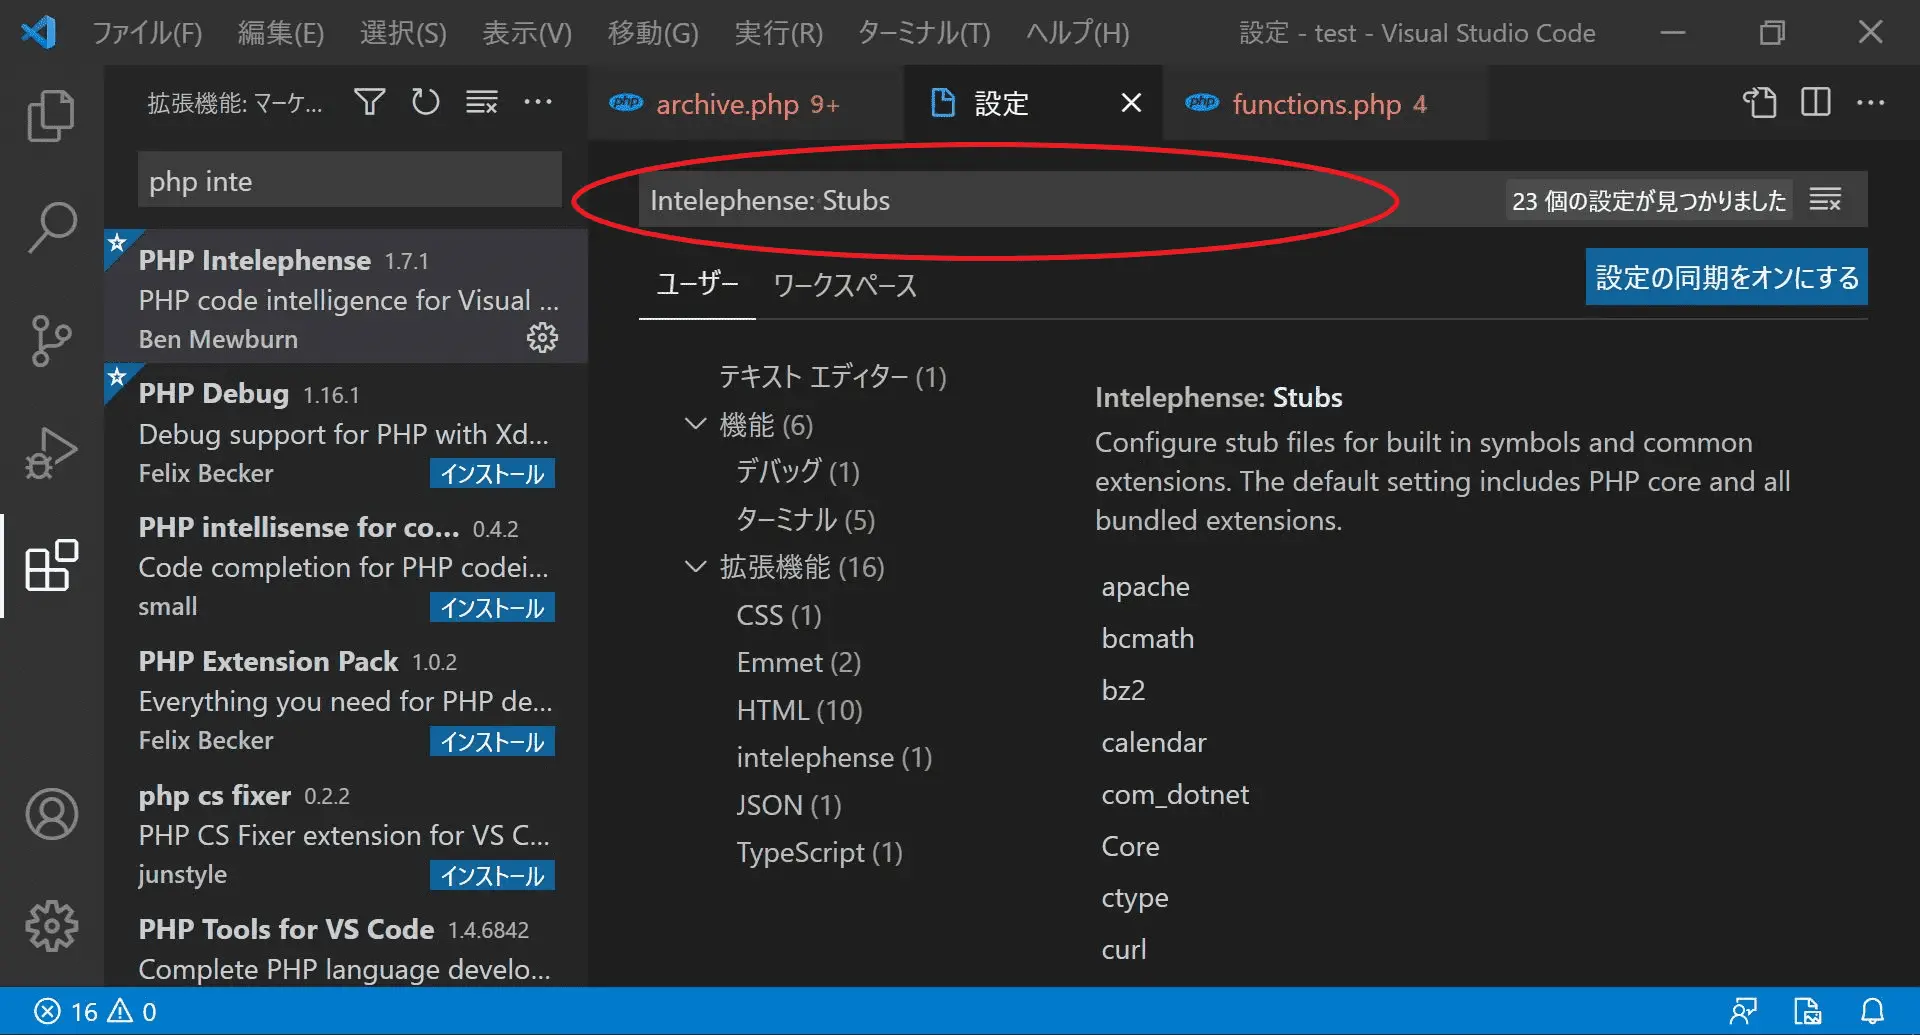
続いて以下赤枠の検索窓から「Intelephense: Stubs」と入力しましょう。
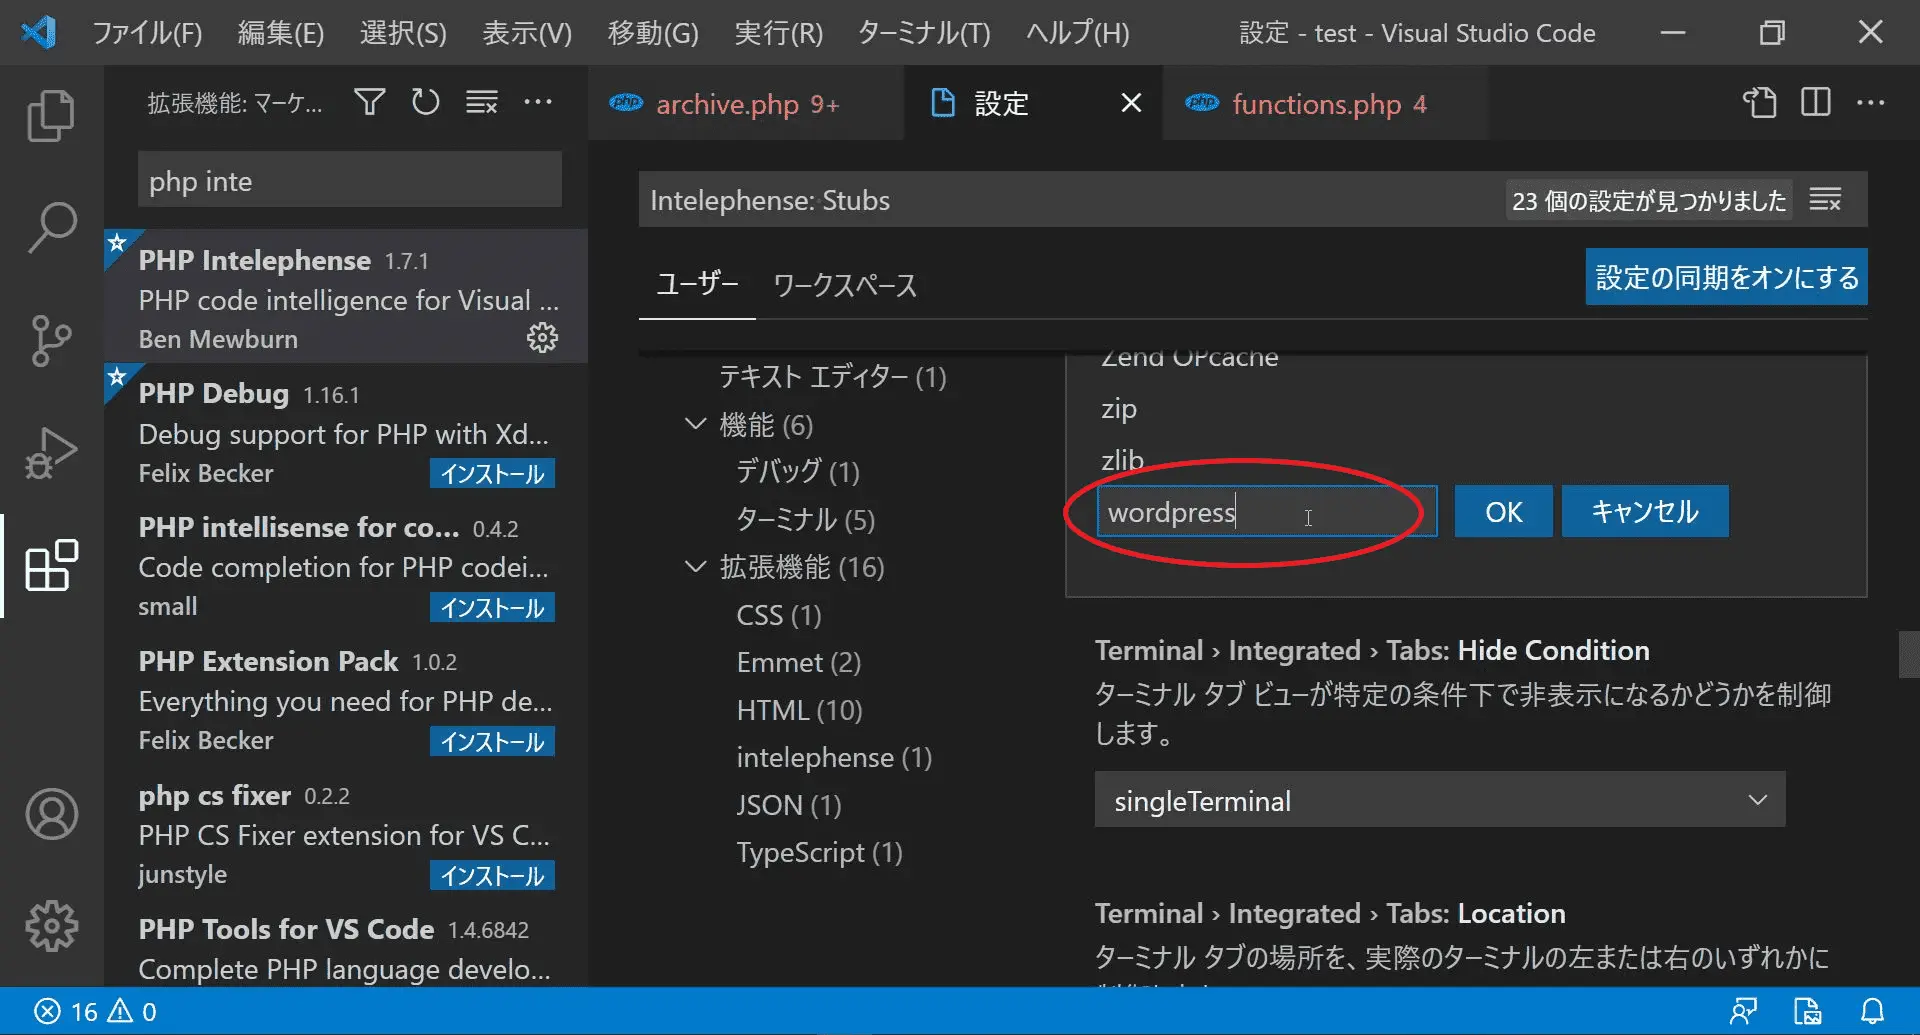
以下「Intelephense: Stubs」項目の最後の行に「wordpress」を追加しましょう。
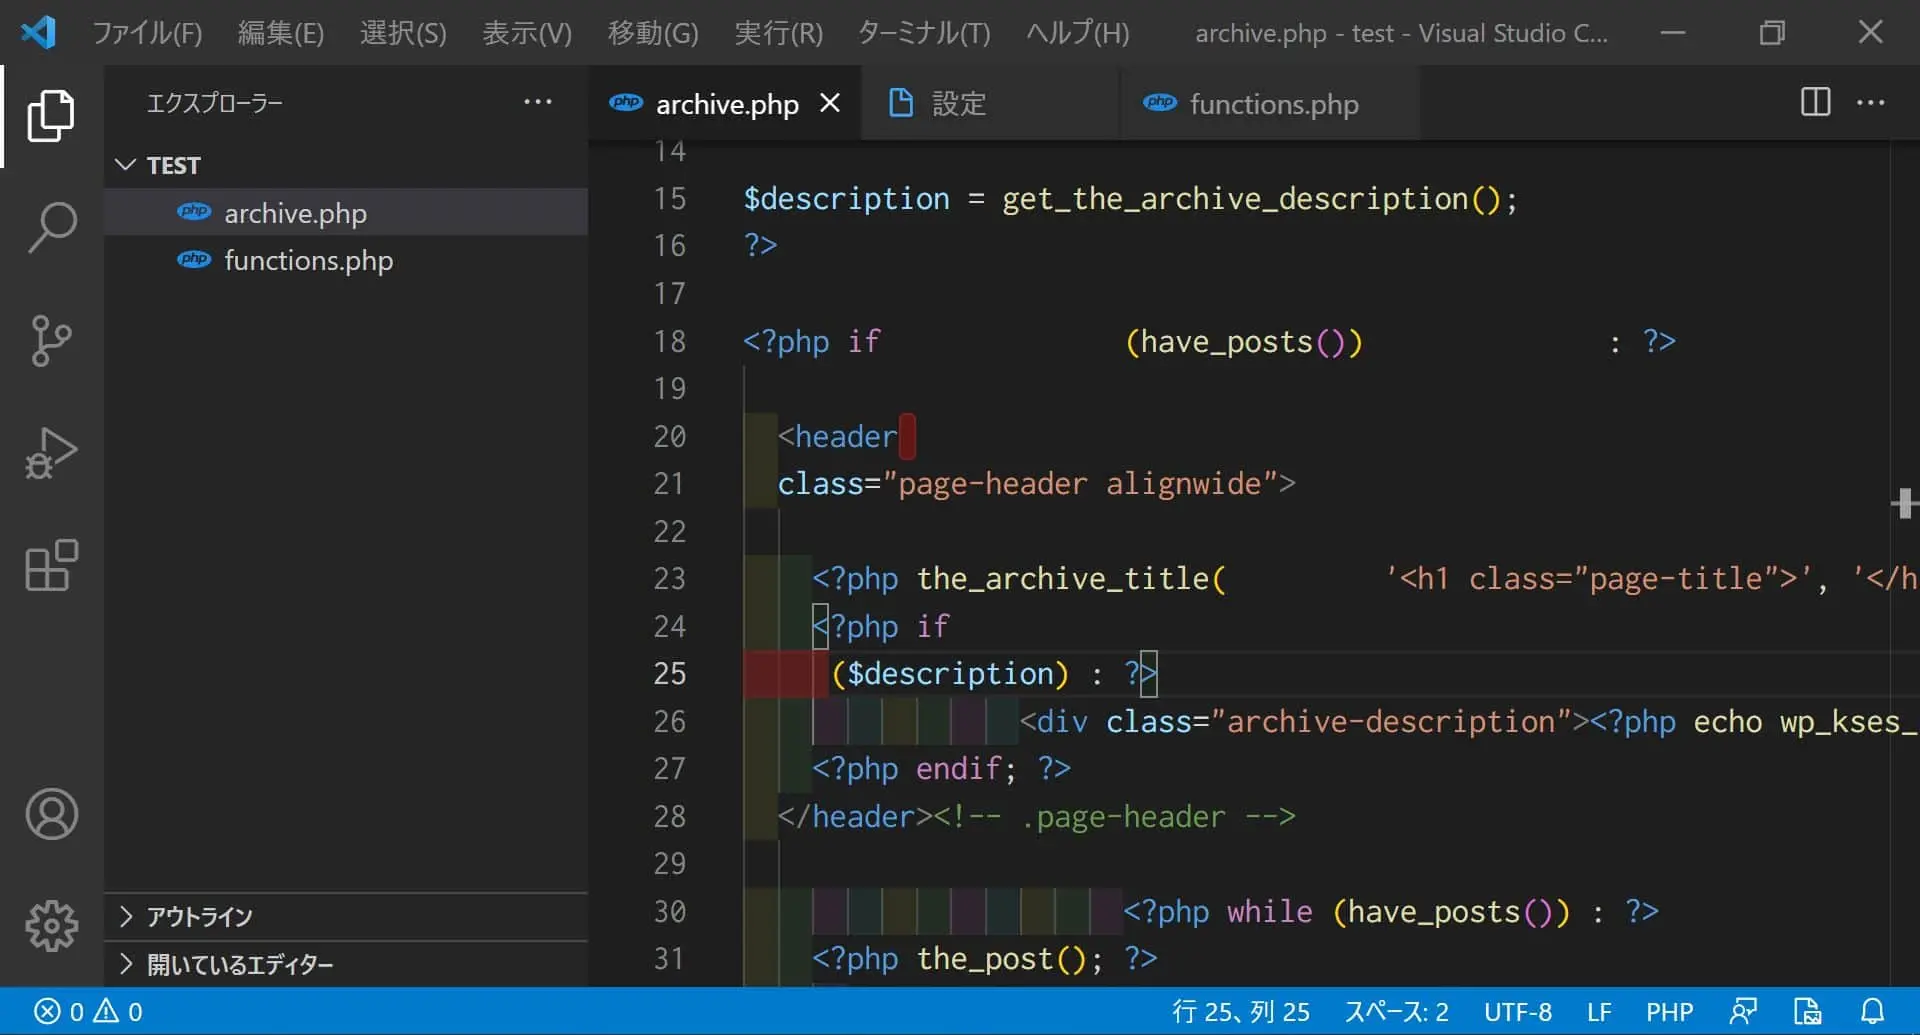
もう一度phpファイルを見るとエラーが消えているのが分かると思います。
コード整形しよう
それではPHP Intelephenseでコード整形していきましょう。
phpファイル上で「Shift」+「Alt」+「F」キーを入力しましょう。
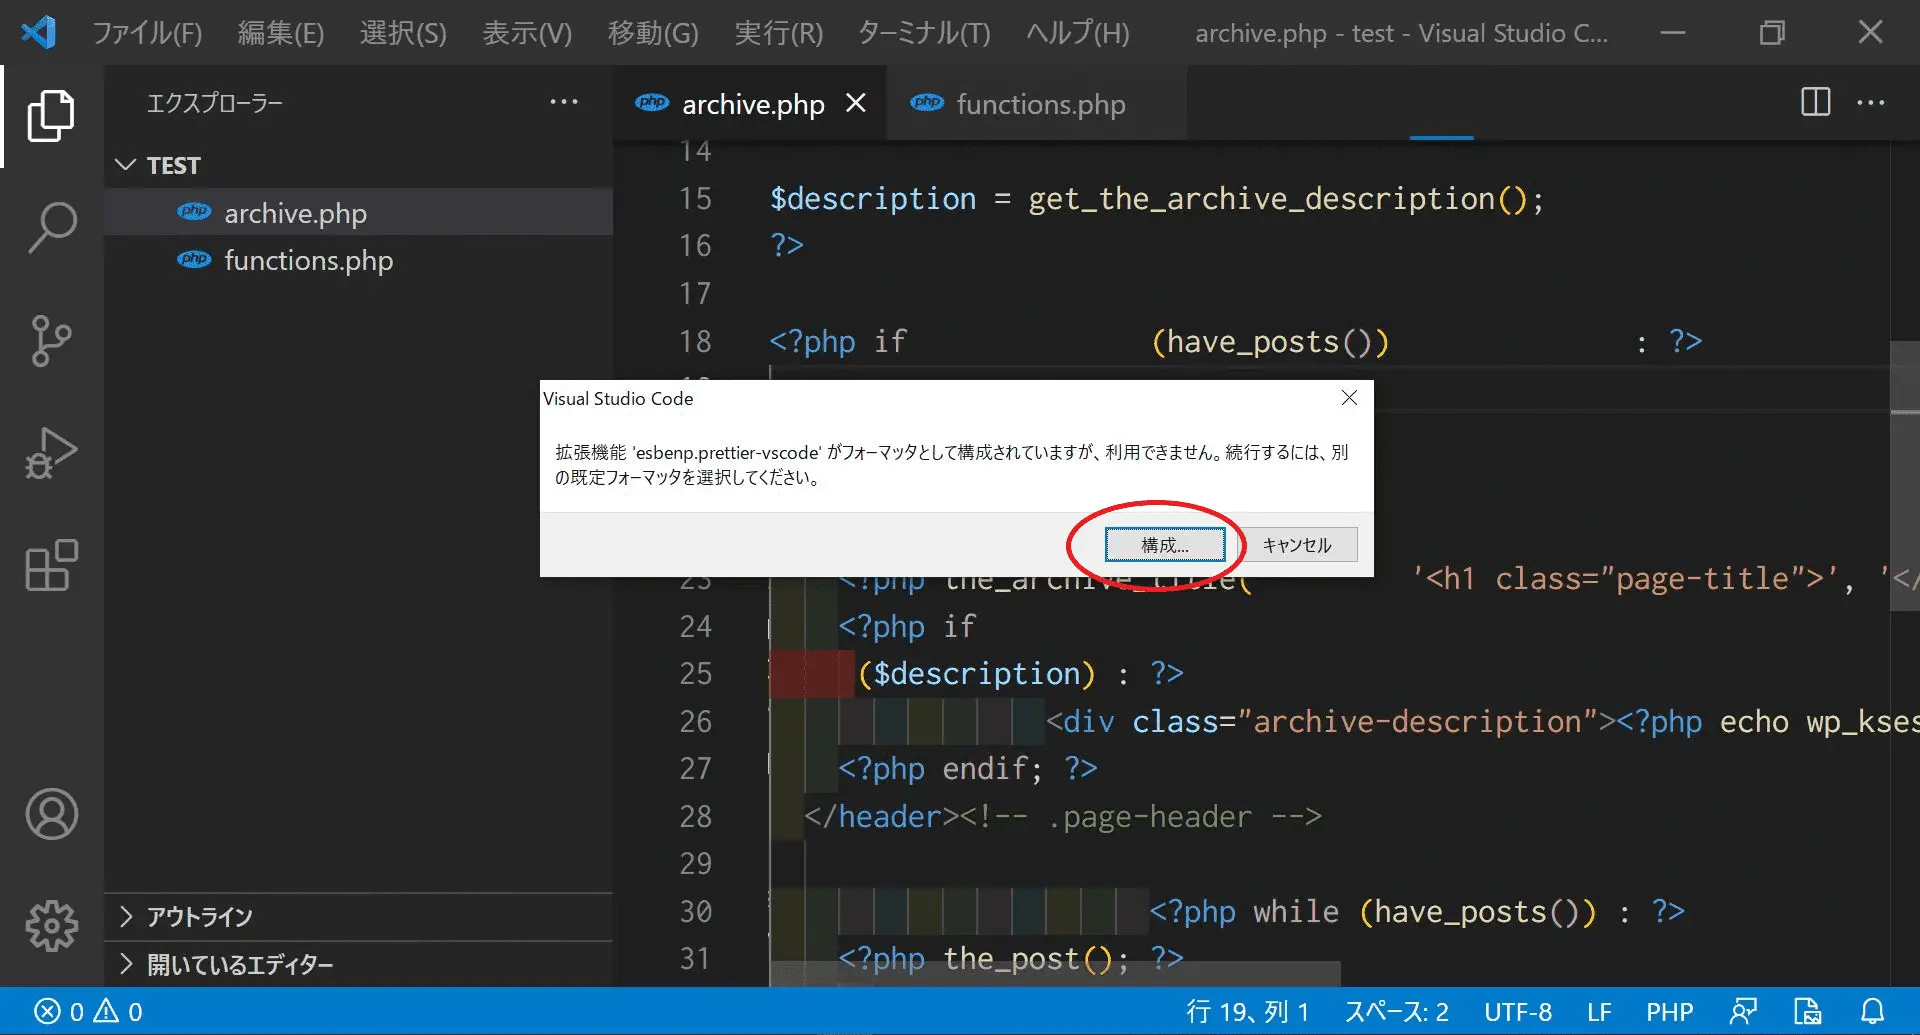
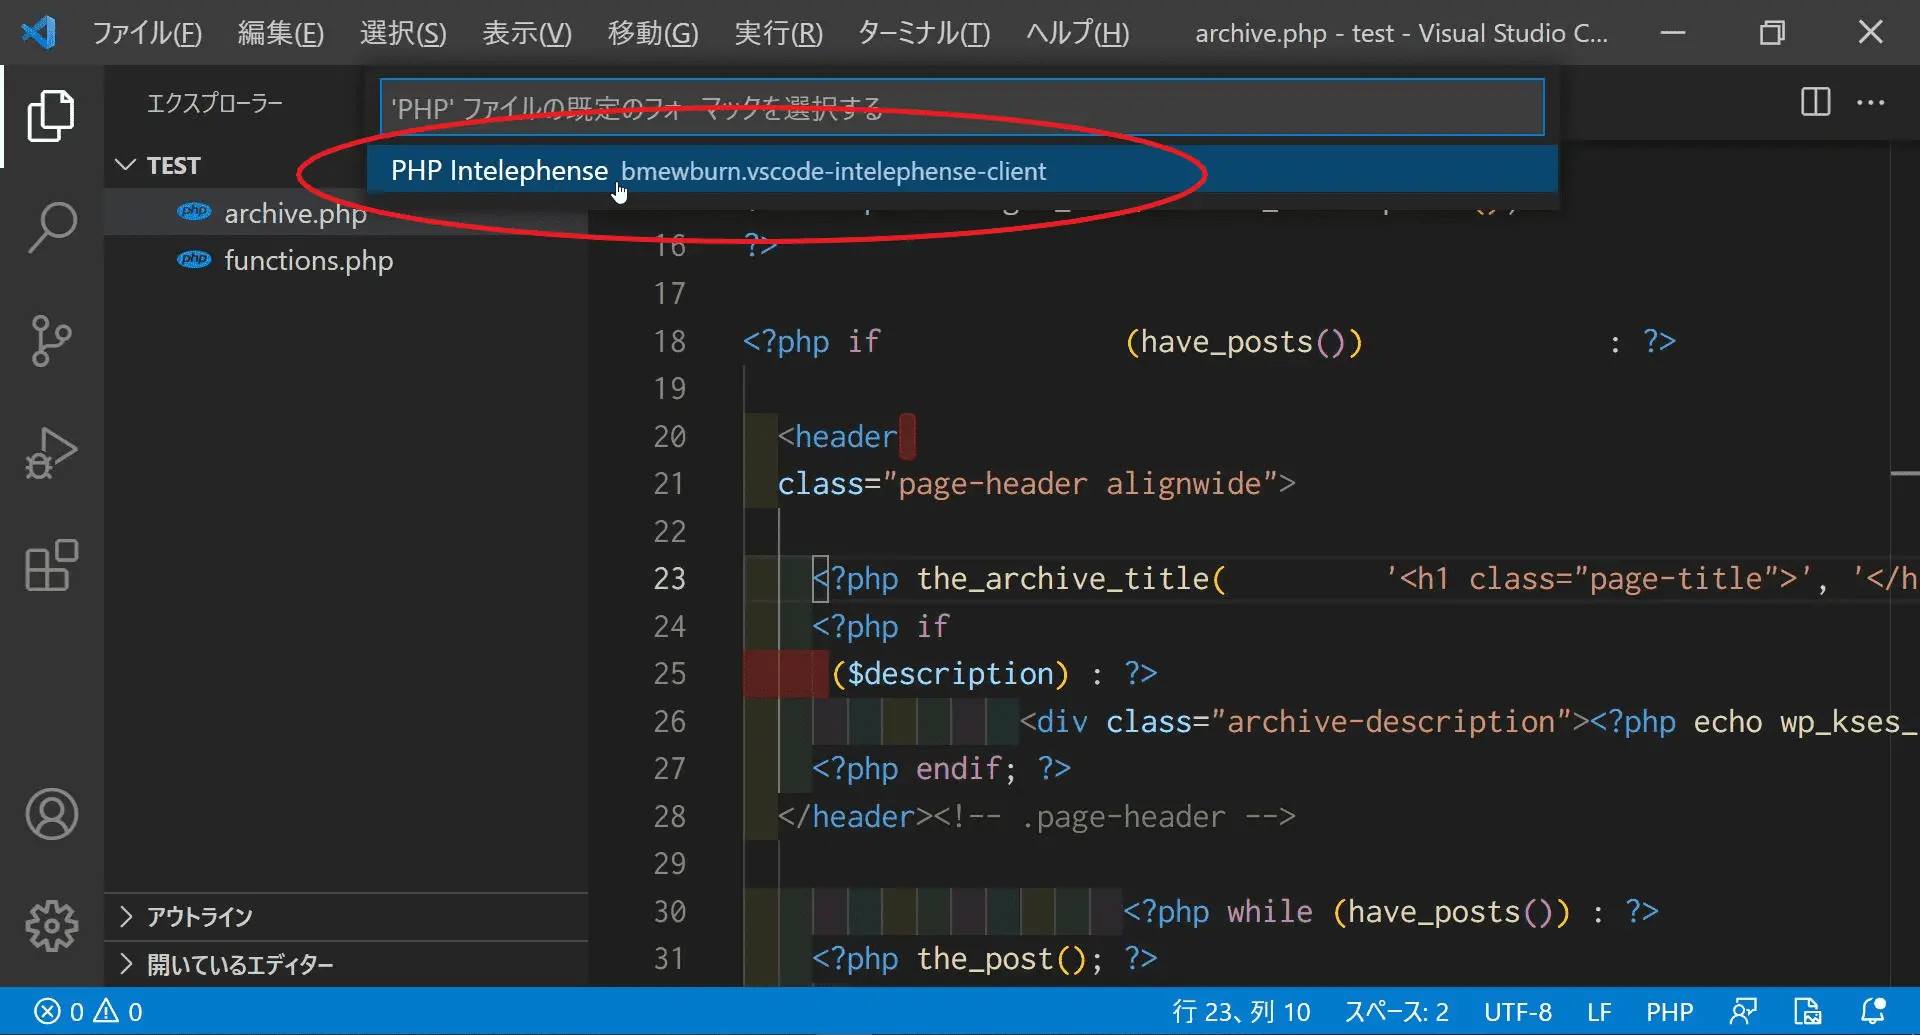
以下のようなフォーマッタを選択するワーニングが出ますので、「構成…」をクリックします。
リストからPHP Intelephenseを選択しましょう。
きれいにコード整形されていれば正常に動作しています。
コード整形後
コード整形後のファイルをそれぞれ参考に載せておきます。
phpのみファイル
<?php

/**
 * Functions and definitions
 *
 * @link https://developer.wordpress.org/themes/basics/theme-functions/
 *
 * @package WordPress
 * @subpackage Twenty_Twenty_One
 * @since Twenty Twenty-One 1.0
 */

function twenty_twenty_one_widgets_init()
{
	register_sidebar(
		array(
			'name'          => esc_html__('Footer', 'twentytwentyone'),
			'id'            => 'sidebar-1',
			'description'   => esc_html__('Add widgets here to appear in your footer.', 'twentytwentyone'),
			'before_widget' => '<section id="%1$s" class="widget %2$s">',
			'after_widget'  => '</section>',
			'before_title'  => '<h2 class="widget-title">',
			'after_title'   => '</h2>',
		)
	);
}
add_action('widgets_init', 'twenty_twenty_one_widgets_init');
html入りphpファイル
<?php

/**
 * The template for displaying archive pages
 *
 * @link https://developer.wordpress.org/themes/basics/template-hierarchy/
 *
 * @package WordPress
 * @subpackage Twenty_Twenty_One
 * @since Twenty Twenty-One 1.0
 */

get_header();

$description = get_the_archive_description();
?>

<?php if (have_posts()) : ?>

  <header class="page-header alignwide">

    <?php the_archive_title('<h1 class="page-title">', '</h1>'); ?>
    <?php if ($description) : ?>
      <div class="archive-description"><?php echo wp_kses_post(wpautop($description)); ?></div>
    <?php endif; ?>
  </header><!-- .page-header -->

  <?php while (have_posts()) : ?>
    <?php the_post(); ?>
    <?php get_template_part('template-parts/content/content', get_theme_mod('display_excerpt_or_full_post', 'excerpt')); ?>
  <?php endwhile; ?>

<?php else : ?>
  <?php get_template_part('template-parts/content/content-none'); ?>
<?php endif;           ?>

<?php get_footer(); ?>
きれいなコードに整形されました。
おわりに
以上PHP Intelephenseを使ってphpファイルのコードを自動整形するやり方について説明していきました。
いかがだったでしょうか。
コードの自動整形ができるようになると、快適にweb制作ができるようになりますのでぜひ導入してみてください。
コメント